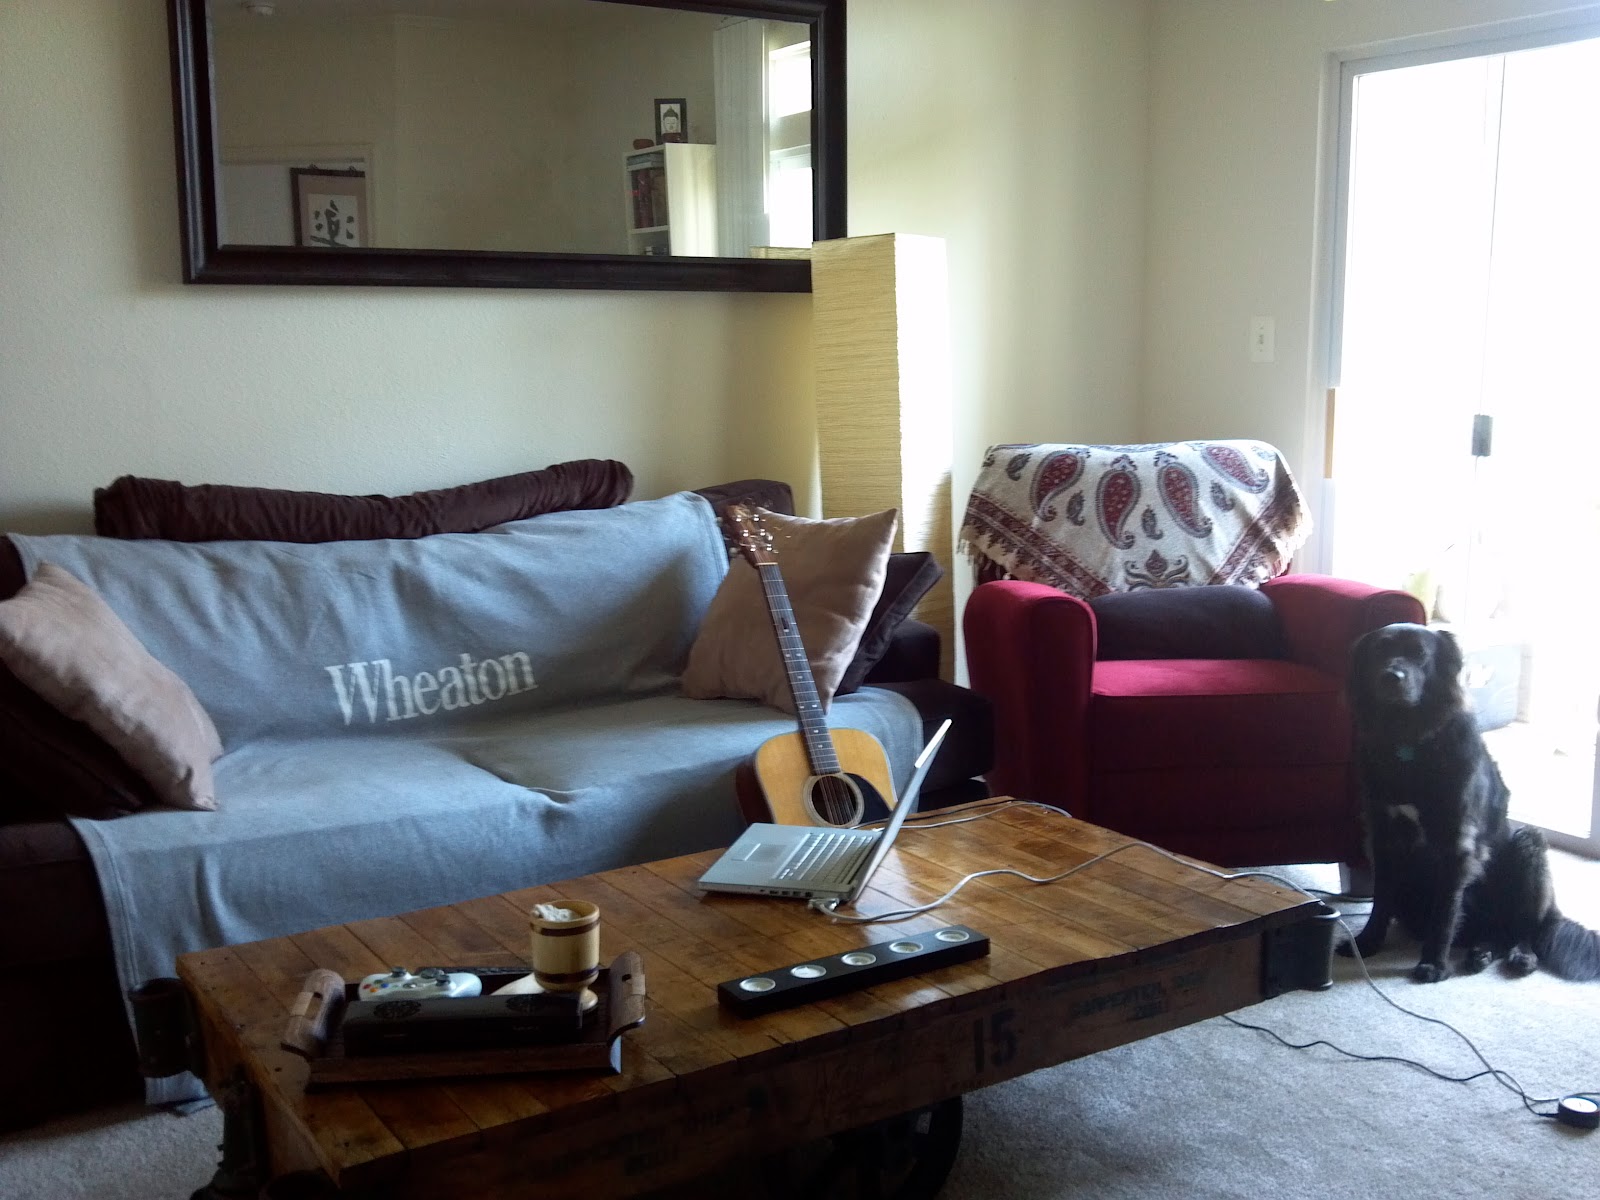
This is the story of how we got this:
From this:

Well, it's been a few months... Four, technically. Many updates to come. Jumping ahead to the present, we're now back in the DC area starting back up our "normal" life, albeit after another month or so of work-free living (and thus hopefully some more travel). In the meantime, we're going to try to catch up on the blog posts for the rest of the Year-Off-Travelscavaganza. Next stop: Austin, Texas.
But, in an effort to totally confuse the space-time continuum, here's a post that shows the events of two weeks in mid-June, during which we found an old, dirty factory cart, and I decided I would turn it into our new coffee table.
We walk into the consignment shop looking for a steamer trunk to use as a coffee table. Before we even get in the front door, I see this dirty thing -- literally thought it was a piece of garbage -- and knew right away THAT would be our coffee table. It took a little bit of convincing, but I was so sure it would work, that I wouldn't back down.
It turns out turning factory carts into coffee tables is quickly becoming a trend: http://www.industrialartifacts.net/vintage-tables---surfaces.html
For the record, we had no idea.
I just looked at it and knew it was perfect. I'm not quite sure what it says about a person when they vehemently believe that one should eat off of what appears to be a piece of trash, but...this isn't a psychoanalysis so let's move on.
These carts were manufactured by the Nutting company in Minnesota in the early 1900s. They're reinforced with iron corner brackets and rated to carry thousands of pounds of weight in factories and for various industrial purposes. And I'm going to
Step 1: Sand the CRAP out of it.

It took almost two weeks to finish restoring the cart, and more than 50% of that time was sanding down the many layers of grease and dirt that had seeped DEEP into the wood. For lack of a belt sander at home, I started with a random orbital sander with 100 grit paper, just to be safe and not risk tearing off too much of the surface. After a day spent pushing surface grease around, it had achieved... nothing.
Then I moved down to 80 grit, again, just to be safe. Wasted two days on that...
Then 60 grit. Still nothing.
Then after several lost days and a whole barrel of wasted elbow grease, I had officially destroyed the sander. Time to move on to a belt sander (thanks Mom and Dad...) with 40-grit sandpaper.
Fifteen minutes later, I was done. Lesson learned: if you think you need a belt sander, you need a belt sander.
Here's a before-and-after of a sanded slat and an unsanded one, with some of the imperfections left in place so they'd be brought out with stain and polyurethane later:

Step 2: Remove all the slats


This is when people started wondering why I was destroying our new table. Turns out that all along my idea was to turn this into a trunk with a flip top lid ("flip top" -- is that a thing or did I make that up because I don't speak dem' good words wit mine mouff?)
I pried each slat off, careful not to break any of the joints -- they're actually maple floorboards that fit together on the long ends. Unfortunately, I broke...maybe...half of...them...? Oops. Turned out that would ultimately help in the end though.
By the way, those wheels: total disaster. So, Step 3: Three days of removing deep-set motor grease from every crevice of the four wheels.

This is the best I could do -- forgot to take a before picture. That brown coating isn't rust, it's a thick layer of grease. Nothing really worked, until my mom handed me a bottle of Krud Kutter, and suddenly things were looking up. It took a while, but here's what they ended up looking like:

Didn't even realize they were green until day two... There's still grease embedded deep in the bearings and casing (I'm almost just completely making these terms up now...) but at least it's dry and not going anywhere. I also had to sand the rust off the unpainted outer edge of the wheel, but that was easy.
Step 4: Remove about 100 finishing nails from the slats... (bare feet -- the key to successfully working with rusty nails)

...and build a frame to hold the whole lid together:

Step 5: Install the interior frame and floor of the trunk (things are really moving now...)

I also put a coat of polyurethane on the wheels before installing the interior, to make sure none of the rust came back.
Now we're at the point where things are going to start going south if I've messed this up. Pieces are going to start falling apart and I'm probably going to lose a toe.
Step 6: More sanding and doing the finishing work before attaching the lid. After a cumulative week of sanding (all the way up to 220 grit) I finally got it to where I wanted it

Then after a first coat of natural stain (clear coat) I wasn't too happy. It just looked... dirty...again.

So another coat of stain...

And another...

And another...

And I finally ended up with what I wanted. Then, after a coat or two of poly:

Step 7: Attach the piano hinge and two lid stays to keep it open.
It's hard to see, but that black line along the back is actually a four-foot piano hinge keeping the whole thing together.

I thought this picture would help show the hinge... it doesn't. Though it does show all the sawdust I forgot to clean out of the interior after sanding it...

So by day 12 I could finally do an overnight lid test to make sure it wouldn't fall apart in the living room.

And it came through like a champ.

Step 8: Keep Winter from walking across it to get off the couch.